I have got my first Raspberry Pi 3 several years back and was using it as a cheap desktop for travelling. It was the first SBC board I got. It was lightly used and as I stop travel, it has been put on the side to collect dust for several years.
Earlier this year, I salvaged two old HDD hard drives when cleaning up old computer stuff. I bought an ORICO 2 bay hard drive enclosure to fit them. I was only planning to copy stuff of interest out and then throw the disks away. But, it soon occur to me that the enclosure can be used as a mini NAS if I can connect it to the network. I took out the pi 3, plugin the enclosure to USB, mount and then samba share the drive. The old drives worked quite well on this setup. I turned the pi to be a mini download machine. Later, installed plex server and host musics on it so I can stream them to my phone in bedroom.
The setup is quite primitive but has worked for me. There are several things I wanted improve. The first is network speed. Pi 3 only comes with 100Mbps Ethernet. It is fast enough for download but when copying stuff from the drive to my desktop, it definitely needs some patient. Another thing is that the ORICO enclosure could get quite hot, especially for Hongkong summer. I bought an extra fan to help. Last but not least, pi 3 is not that powerful. The first time I import my music library to plex took 2 days for indexing!
With a working pi running on my network, I started my journey of tinkering with SBC. I quickly run into Jeff Geerling’s Youtube channel, which is a lot of fan to watch. I then started to order HATs myself to play. For example, the Sense HAT. I also ordered another pi 4 to replace pi 3 for better ethernet speed.
When hunting for a better pi case, I have found Michael Klements’s video very interesting. Unfortunately, I don’t have access to a 3D printer. But, the idea of having an OLED screen is cool for me. I ordered the screen from Amazon and connected it to the pi’s GPIO pins. The display works. However, without a case, the day to day usage is kind of messy.
One more problem for me is that since the display is using I2C and 5V pins, I cannot connect other I2C HATs which also use the same pins. This limitation is really annoying as it seems I need to buy more Pis. After some googling, I found that I could use breadboard to “multiplex” the pins. So, I ordered breadboards. This makes my desk even more messy.
Having a messy desktop is kind of okay when I am actively working on pi projects. But when I need to work on something else and put pi aside, it becomes quite annoying to have jumper cables everywhere. I realized that what I need is a case solution which allows me to do all the experiments but at the same time easy to be store when I am not working on the pi.
Since 3D printing is out of reach, I was a little bit stuck until I seen seeed studio’s recompute case. It is not a compact case for especially for pi, but the extra space is perfect for my usage case.
So, this is how my pi setup looks like now:
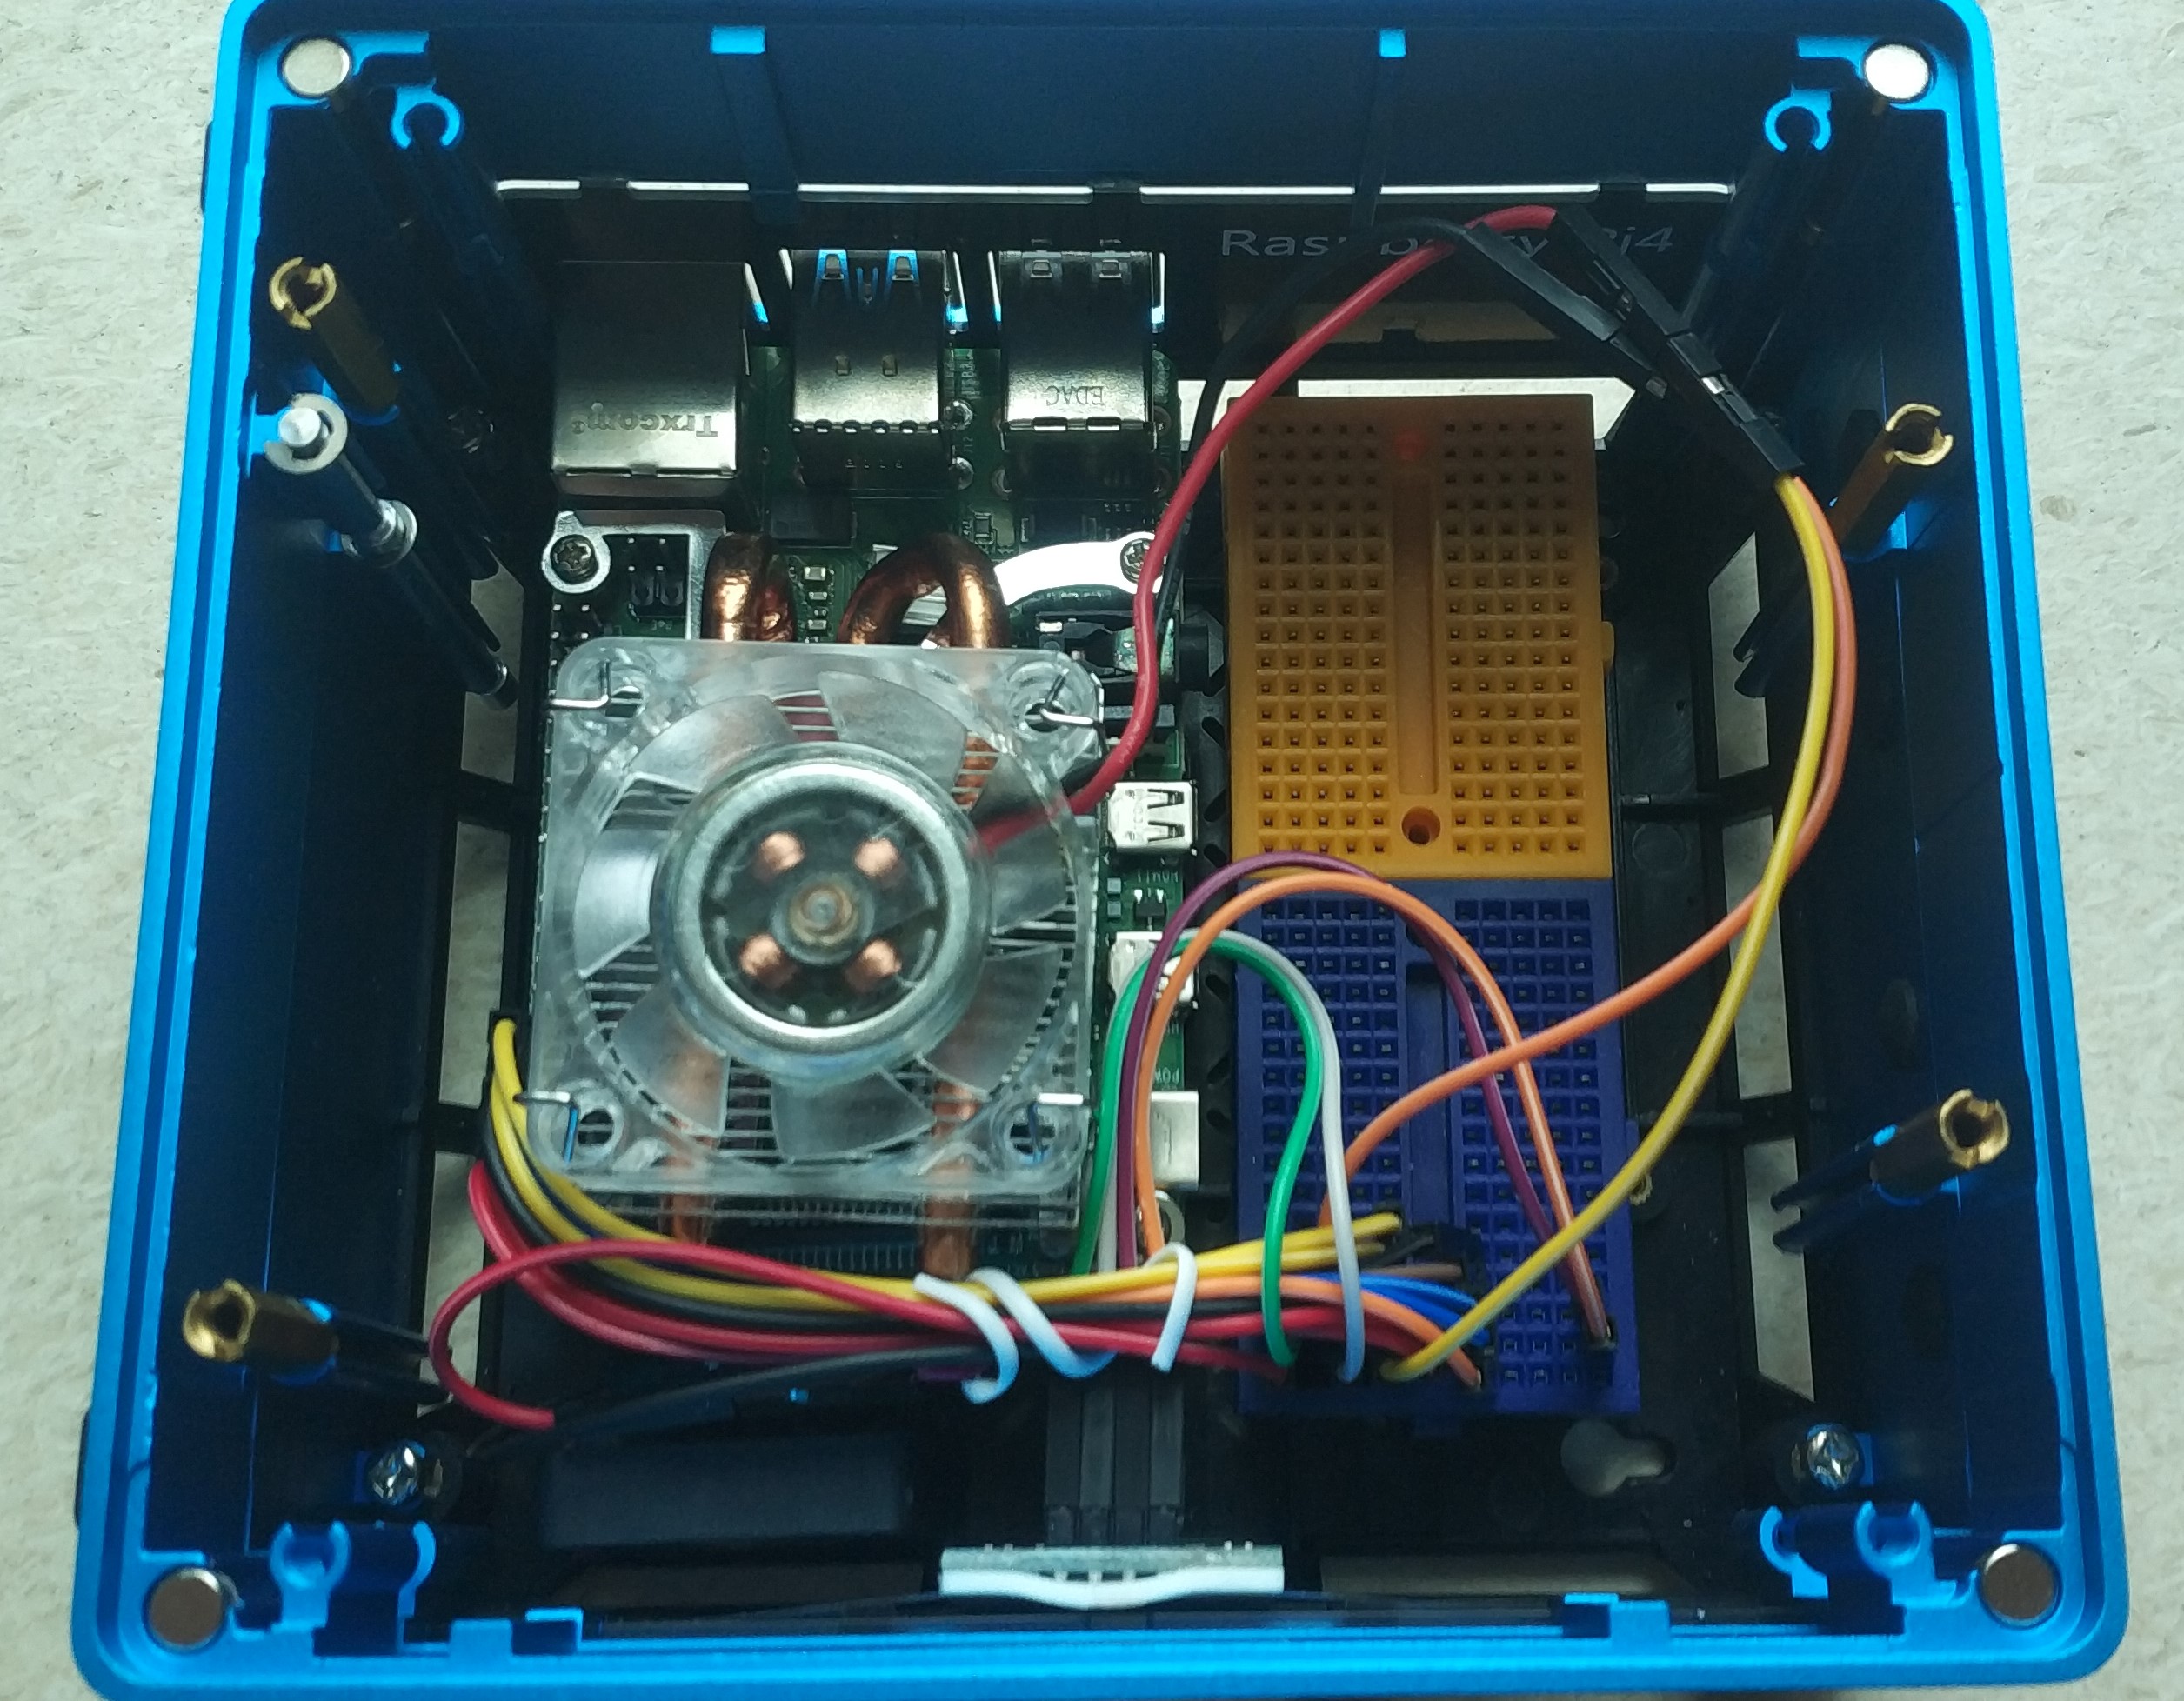
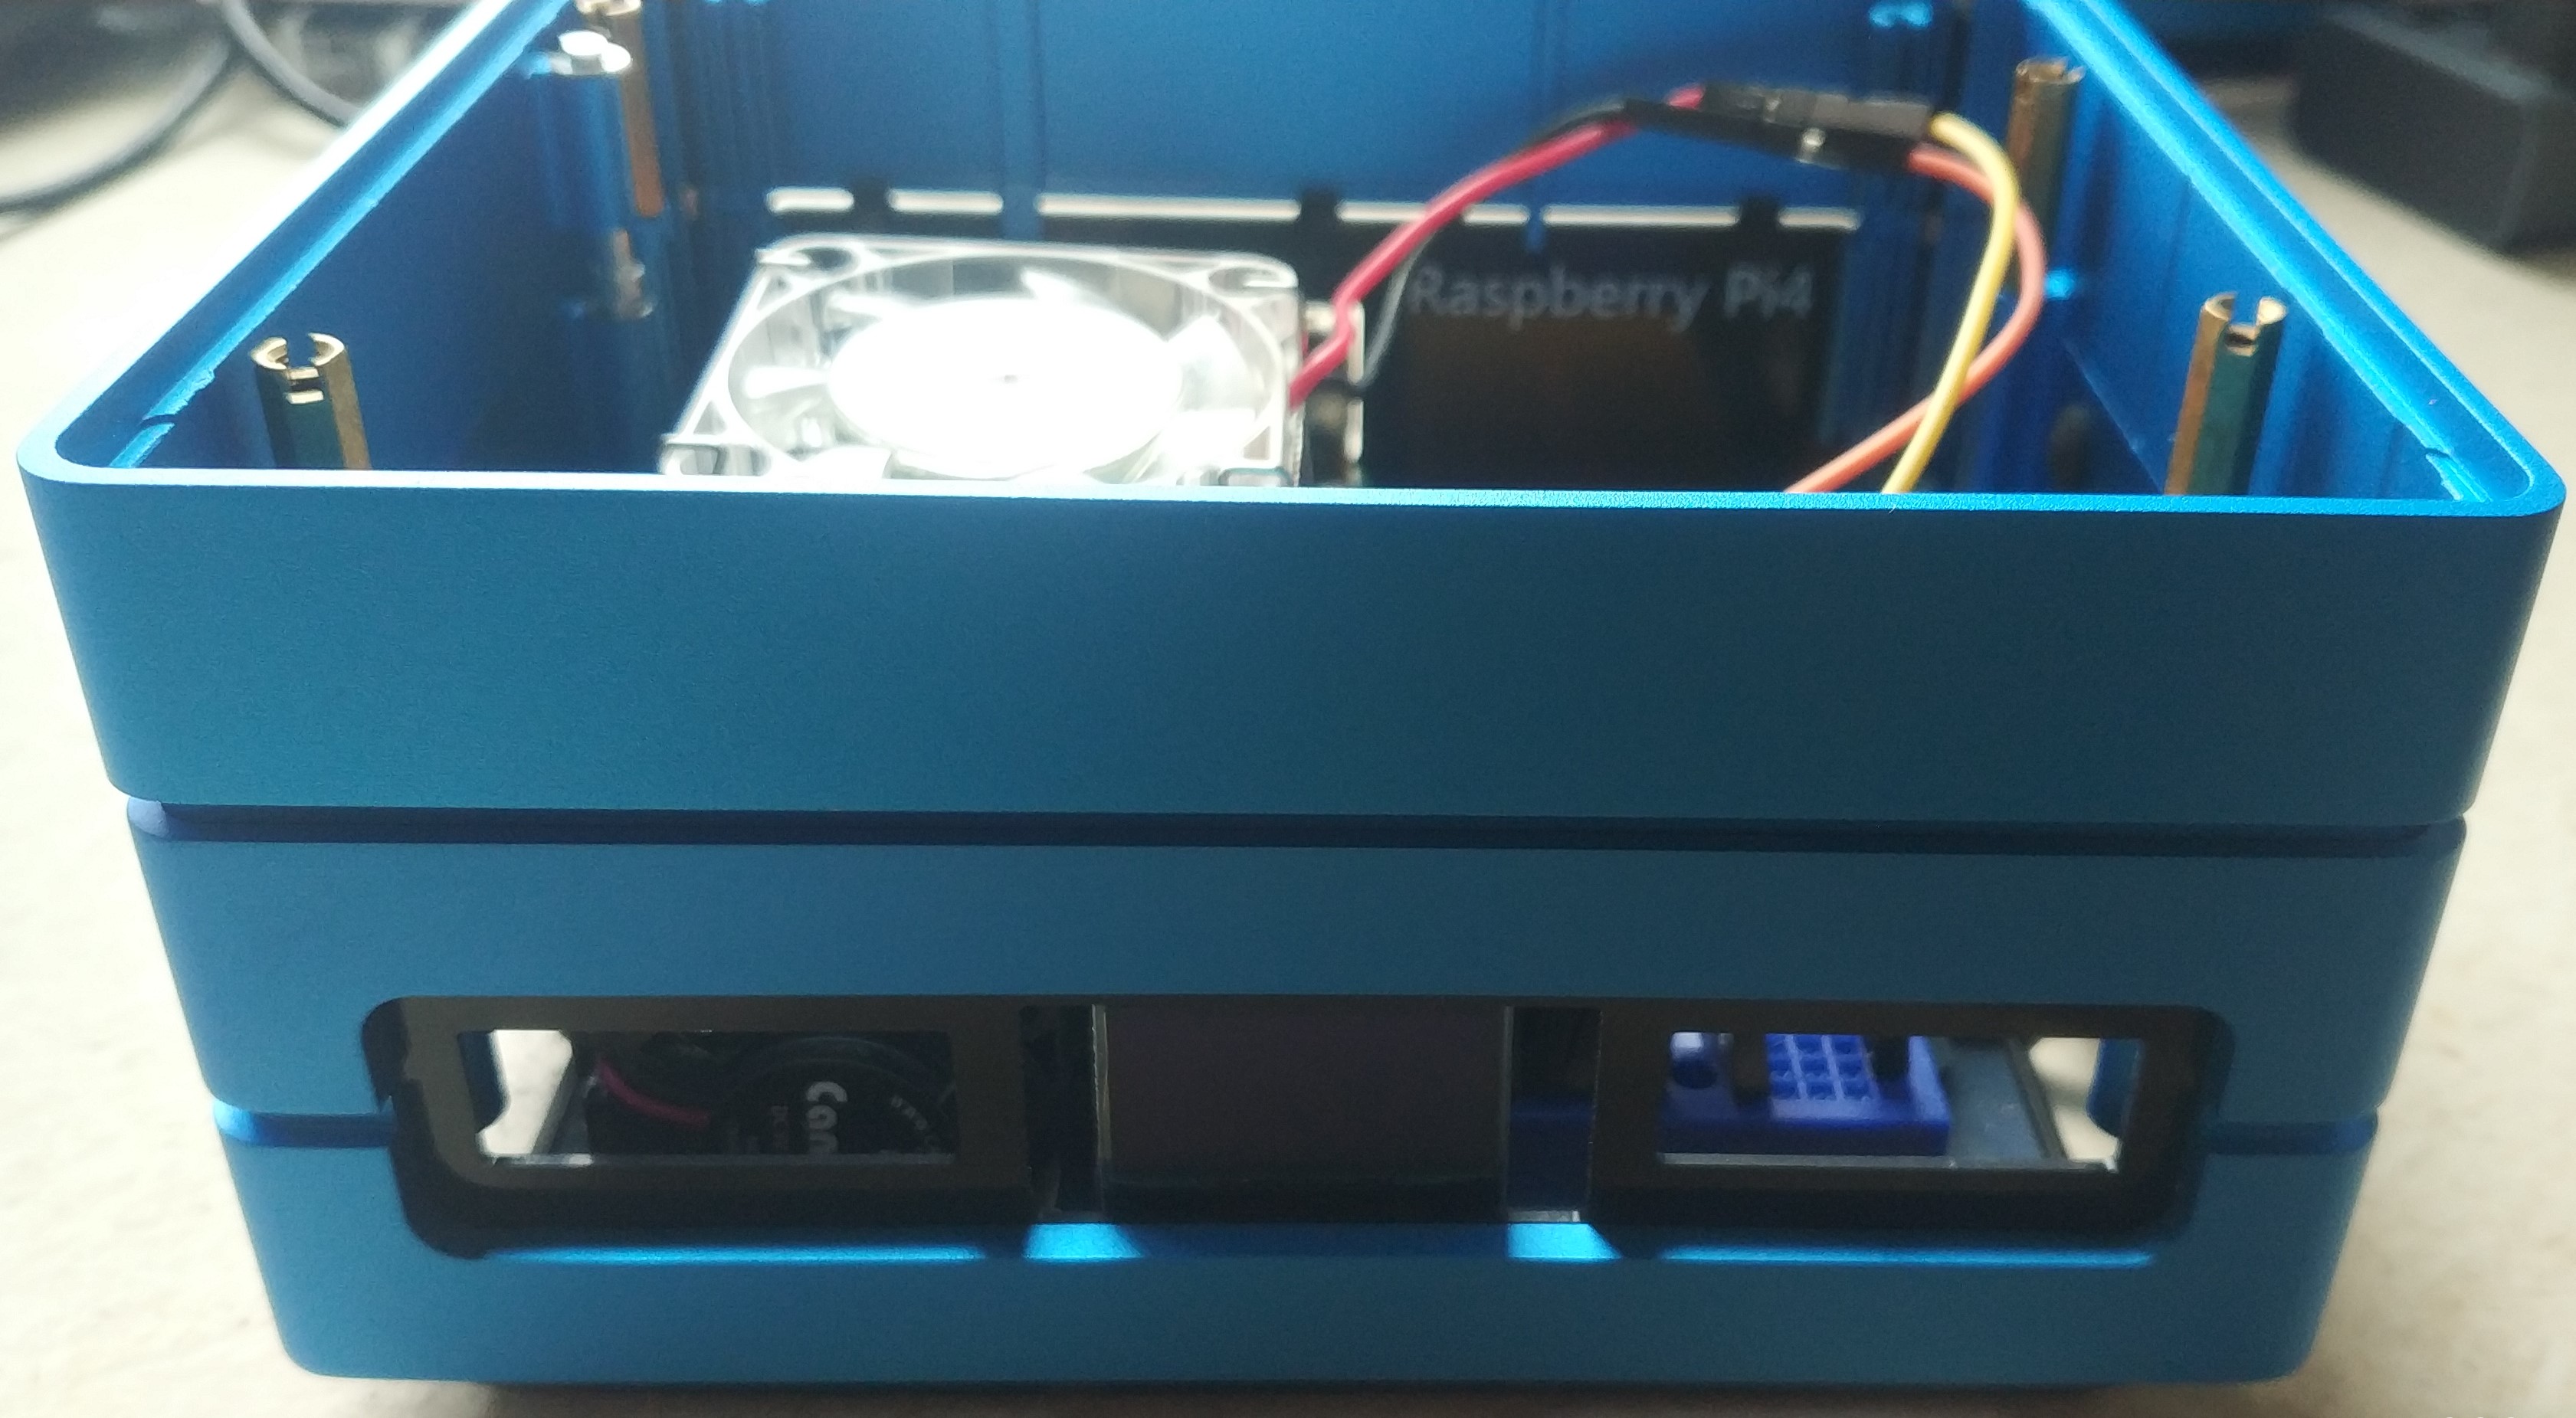
The pi4 is on the left. I fit a Low Profile HeatSink similar to the one in Michael Klements’s video. I had to buy the recompute’s stackable frame to allow the fan to be fit in. Without the extra frame, the fan has to be taken out. I see about 3 to 4 degree drop on CPU temperature when fan is added. I added one extra fan at the bottom of the pi board in the picture to help air to flow out of the case.
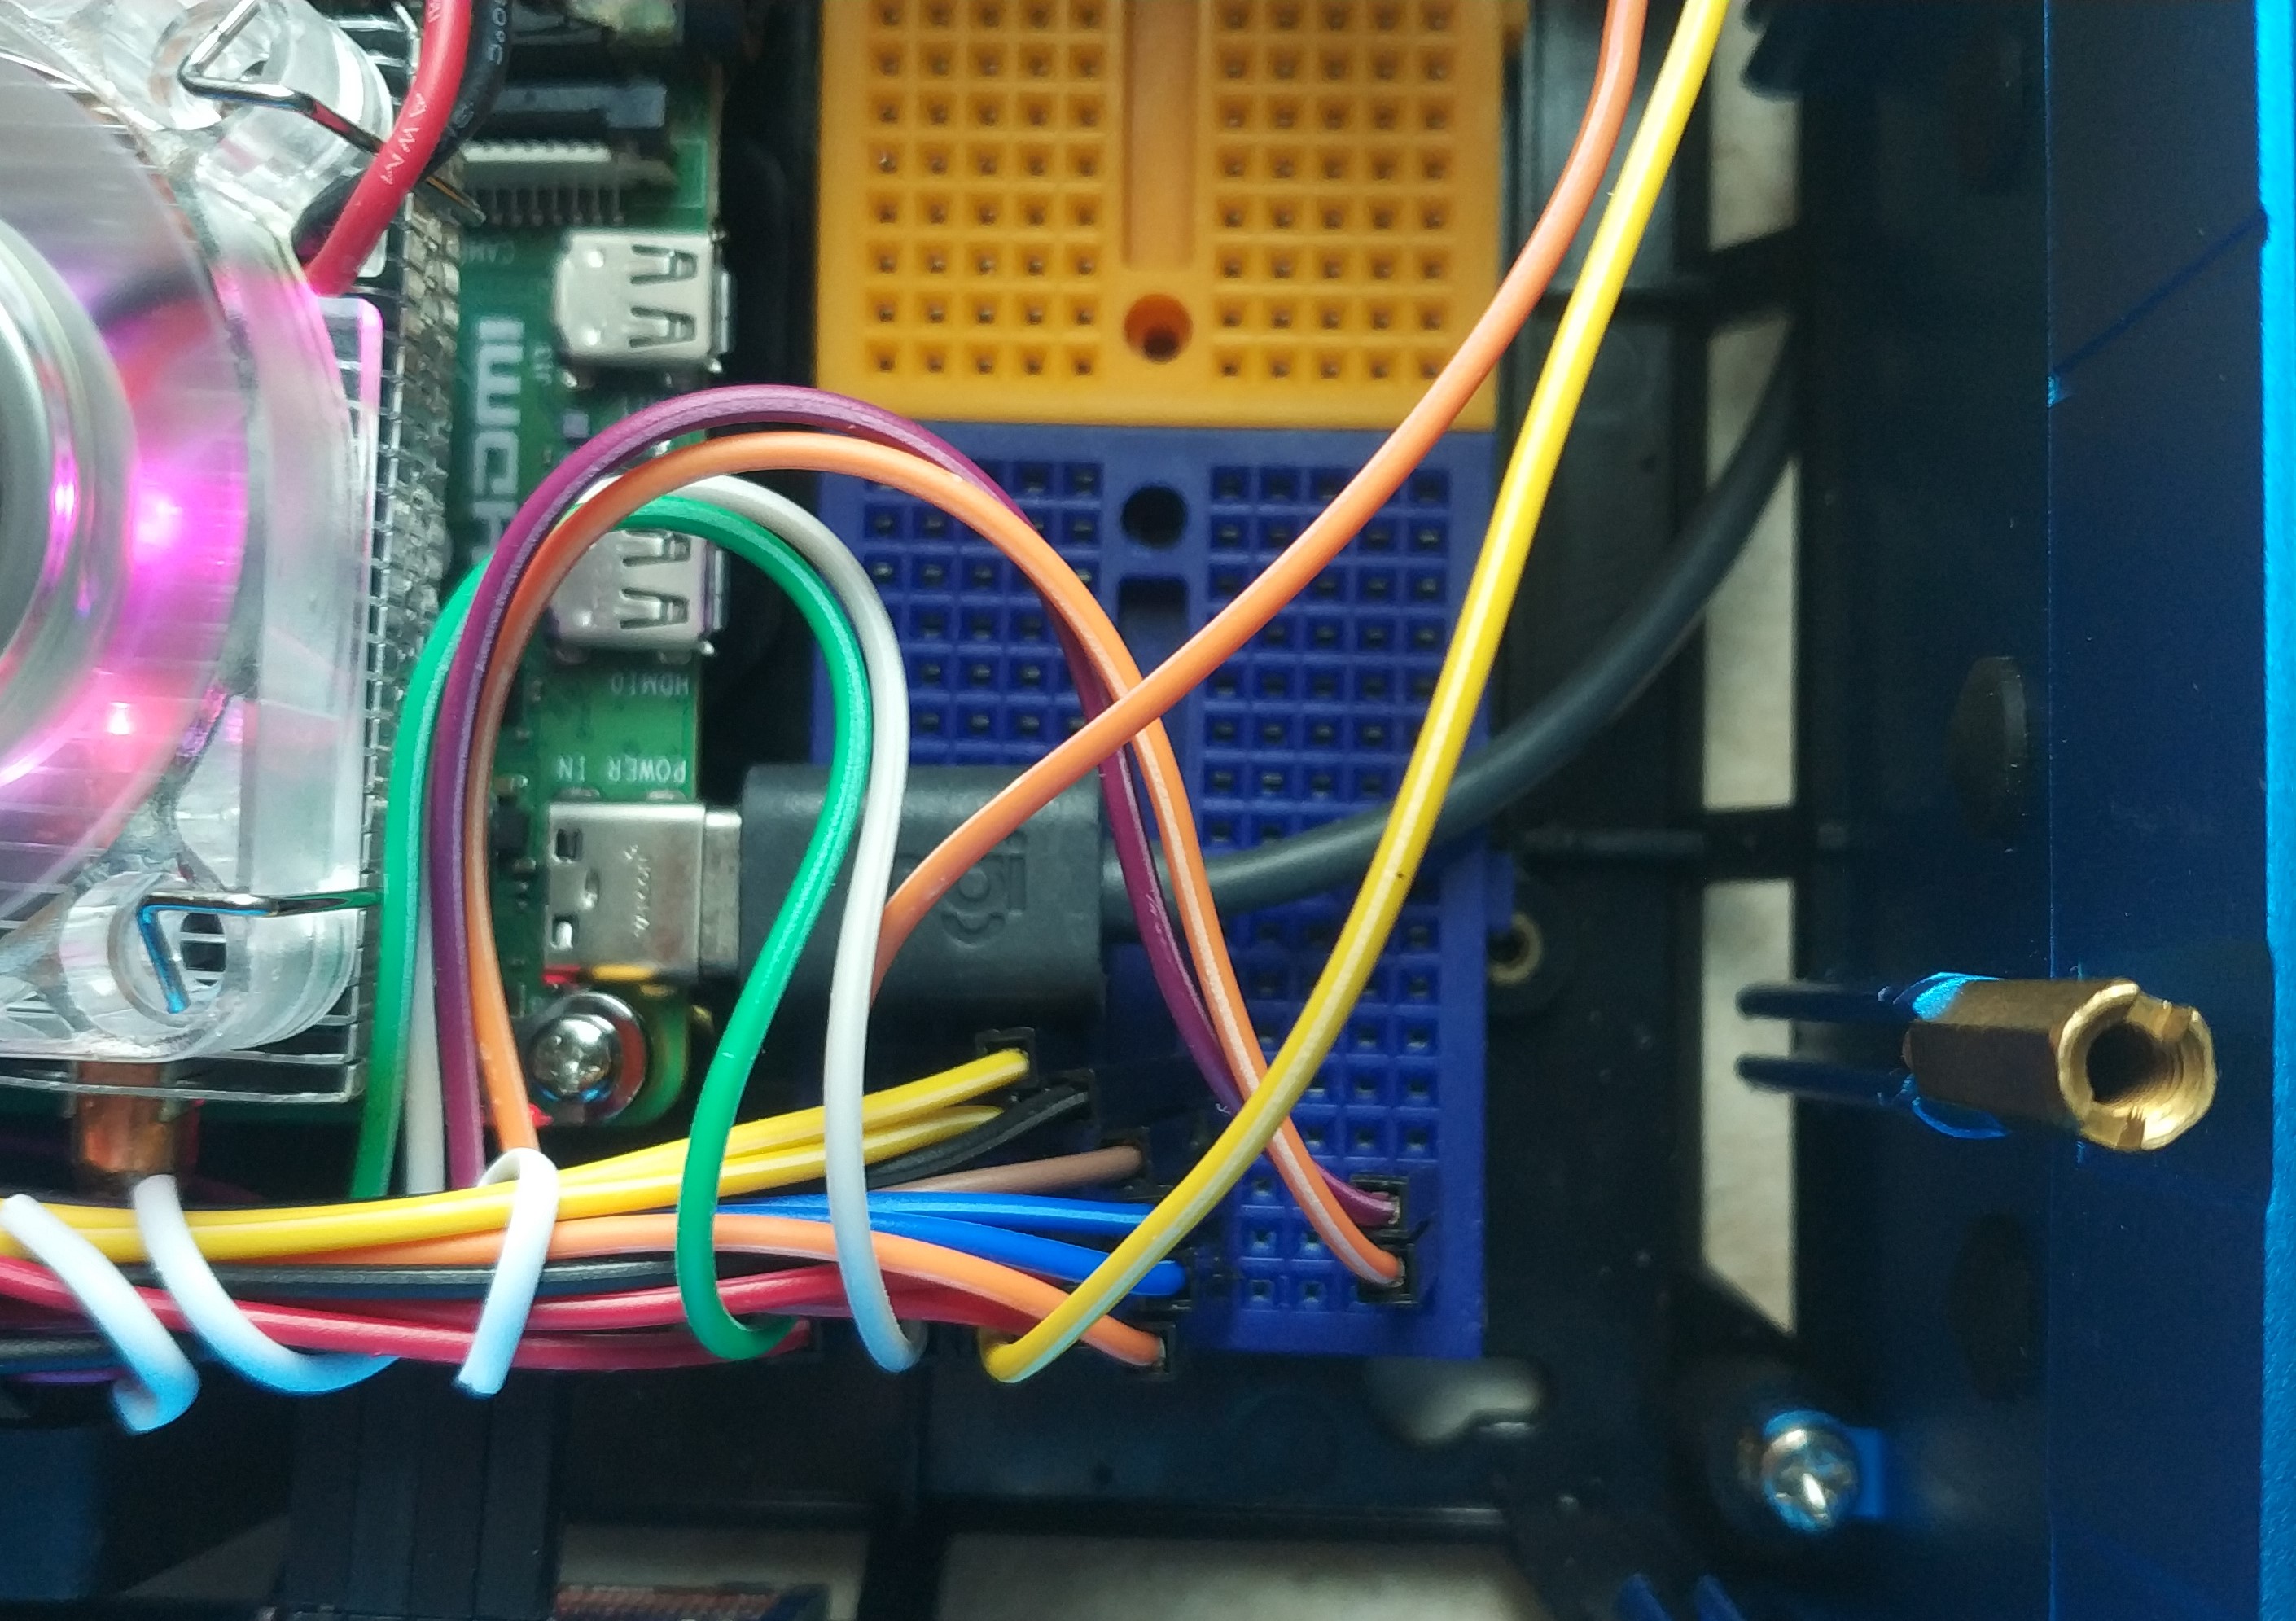
On the right, I have fit in 2 mini breadboards. I have jumper cables to connect the GPIO to the breadboard. The heatsink is kind of in the way, but I just managed to get the cables through. It would be a much cleaner setup if I didn’t have the heatsink installed. But I like the heatsink as Hongkong summary can be quite hot.
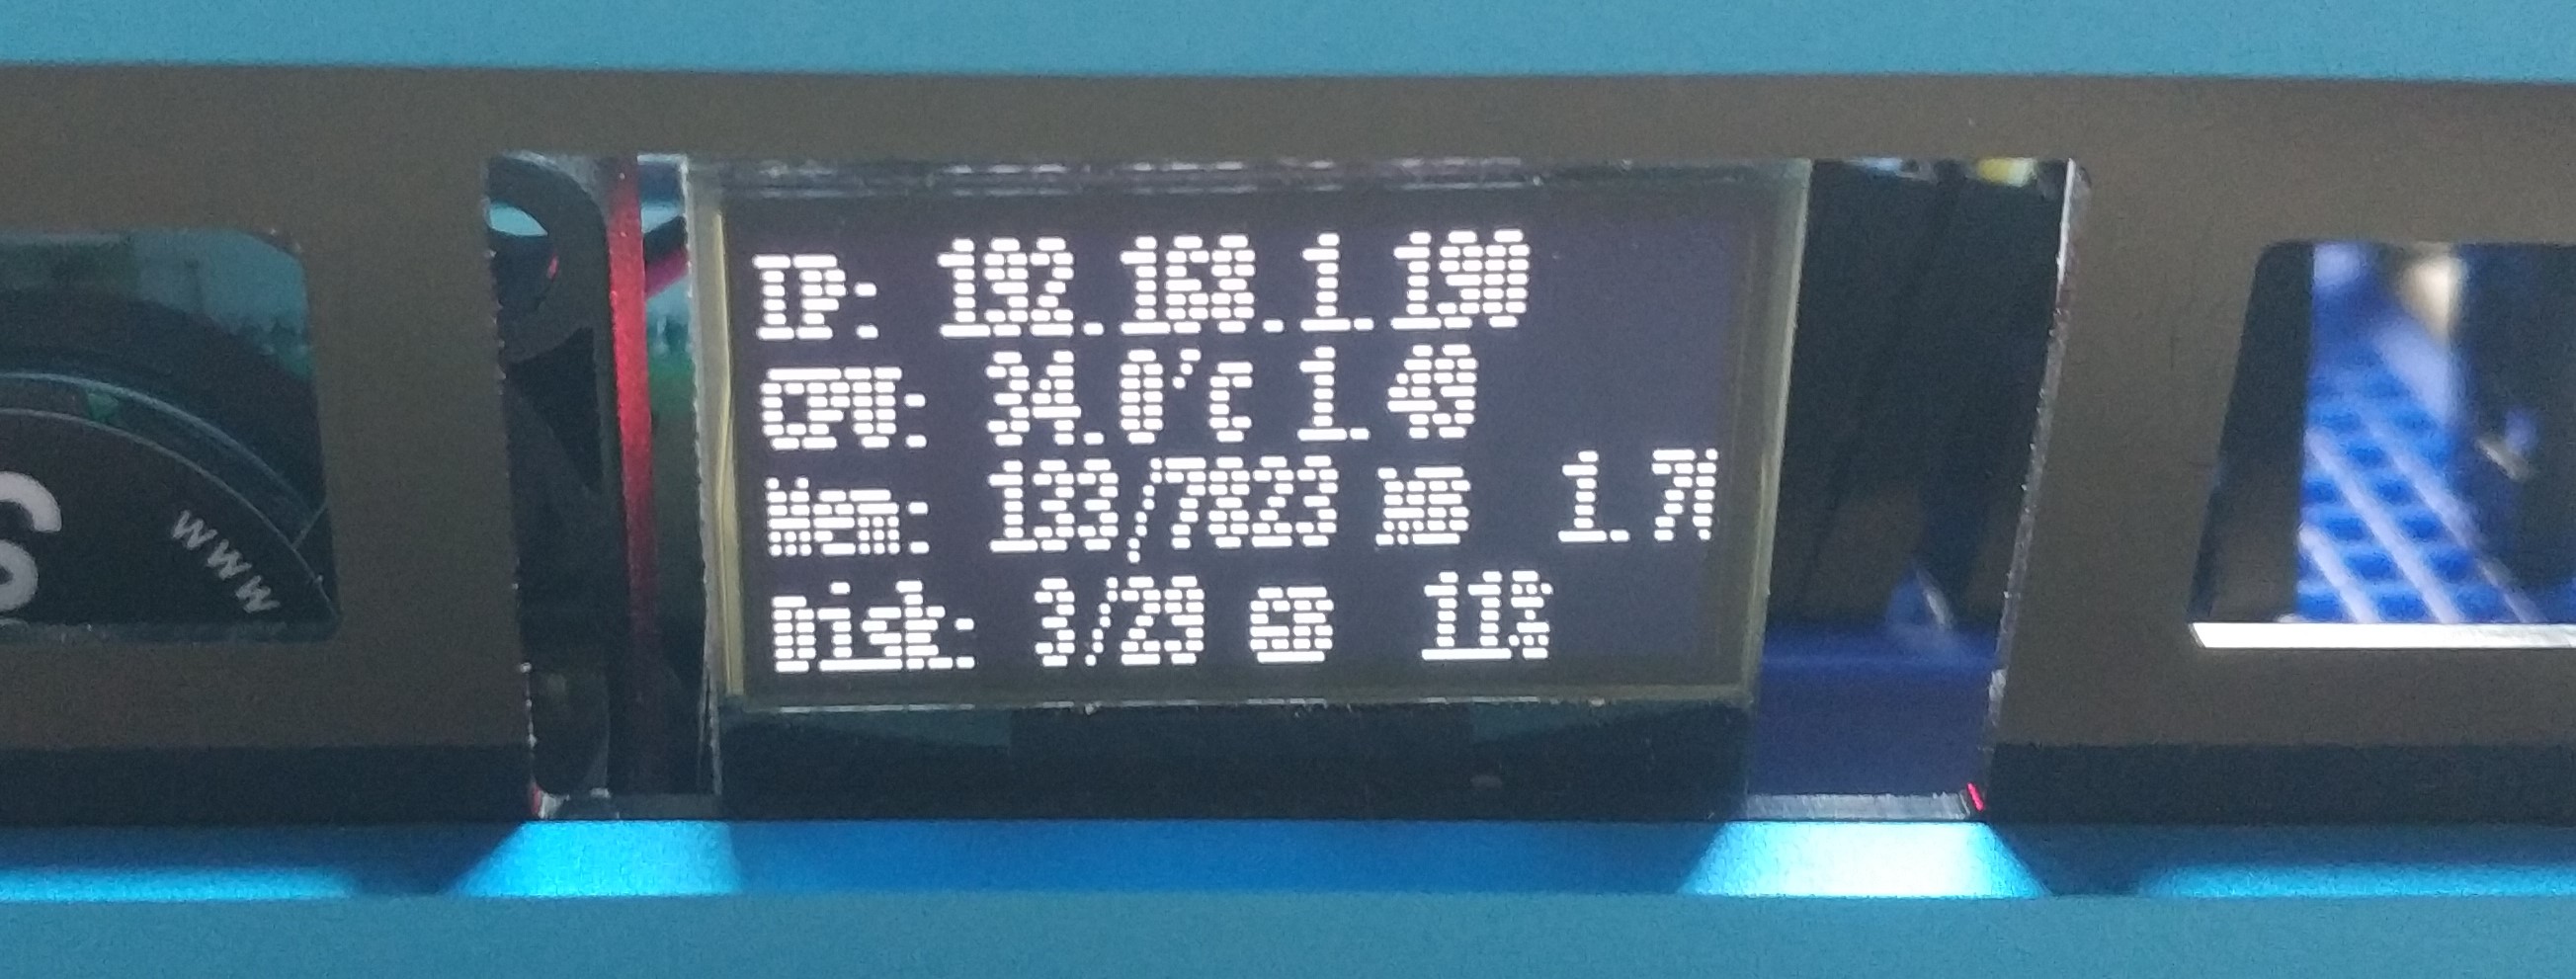
I also fitted a OLED screen:
 with some taps. Like the screen in Michael Klements’s video, it displays IP address, CPU tempature and load, disk and memory usages. The two fans, OLED screens are all connected to the breadboard instead of GPIO. The breadboard allows all three of them sharing the same 5V and ground pins.
With the breadboard, now if I want to connect more HATs or sensors, I could connect to the broad instead of GPIO pins directly. The case contains quite a lot of spaces, especially with the extra stackable frame, to allow me to fit extra stuff. When I don’t work on the project, I can put the top cover and safely store the pi on the side.
One problem I had with this setup is that, it is very hard to access the USB type C or mini HDMI port on pi. I had to run cables via the holes in the bottom part of the case to fit:
 This is working for me now. But it is slightly annoying that every time I need to plug/unplug the cable, I need to remove the top cover. I am ordering a mini USB type C extension cable and will see if that could help.
Overall, I enjoy this setup which gives me the balance between extensibility and tidiness. The case looks quite nice as well!
Last modified on 2021-07-17